Setting up Areas and Tables
Areas and Tables are used by table service restaurants and bars that need to assign checks to a table. In Mynt you can either use a list of all of your tables, or create a floorplan to give you a “map” of your tables. You can also create multiple areas to accommodate businesses that have multiple floors.
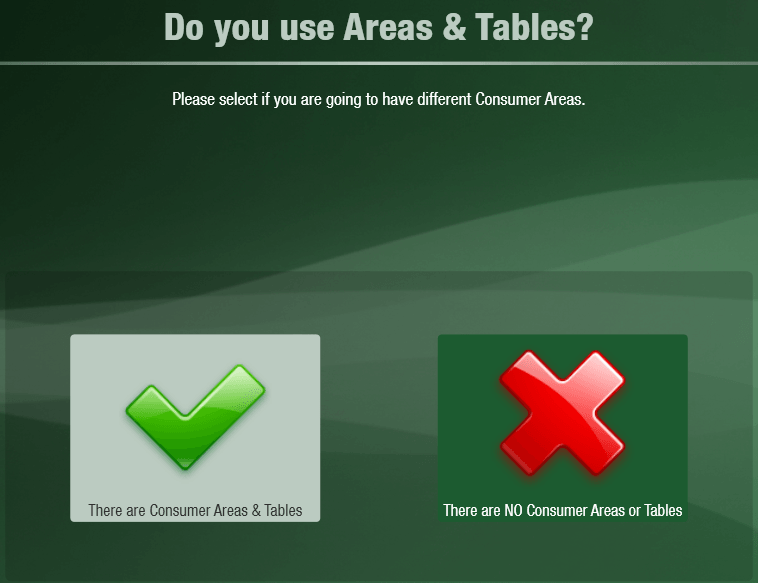
To get started with setting up Tables and Areas, make sure that Consumer Areas & Tables is turned on (Setup > Consumer Areas > Consumer Areas & Tables)
Now that Consumer Areas and Tables are turned on, you will be able to create a floor plan.
Open up Tables & Consumer Areas Management (Setup > Consumer Areas > Tables). Click the Insert button on the left to create a new area.
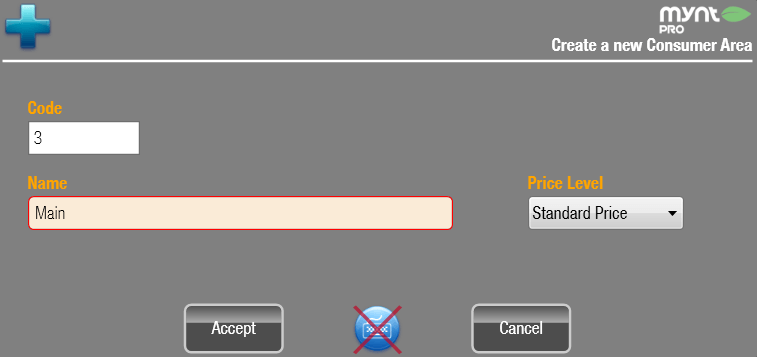
Type in a name for the area, and select a default price level, then click on Accept to save the new area.
When working with tables, there are two different views you can use, floorplan and plan. Floorplan is a map of the layout of your business, plan is just a list of all of the tables. You can create new tables from either of these two views.
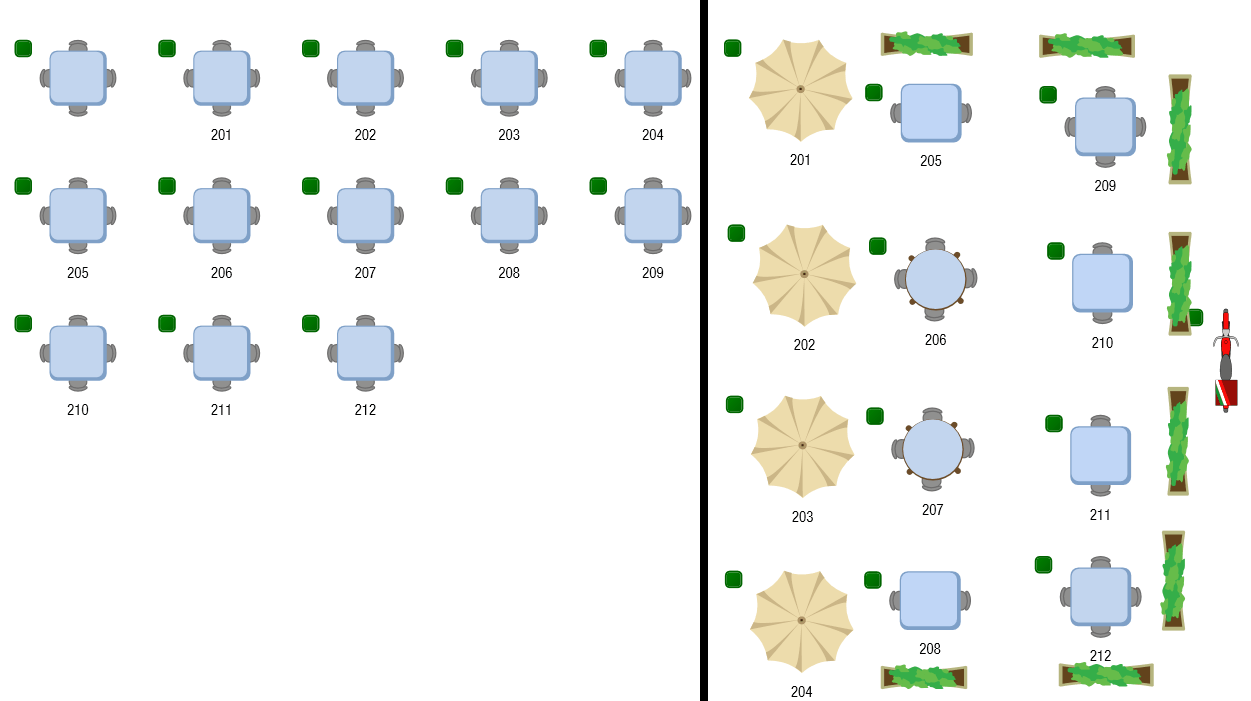
The left side shows the Plan view, with the just tables listed. The right side is showing all of the tables using the Floorplan view.
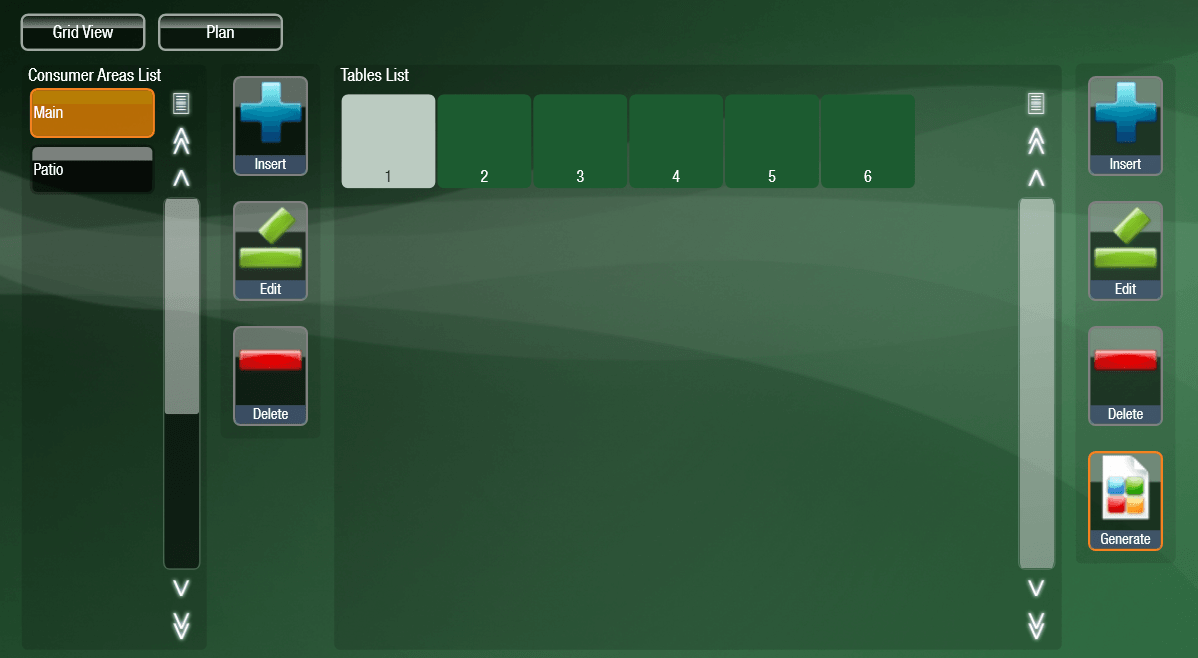
The quickest way to create a large number of tables is to click on the Generate button this will automatically generate the chosen number of tables.

Once the tables have been generated, they will show up in the tables list.
With the tables generated you can then go into the floorplan view and add the tables to their proper location. To open the floorplan view, click on the Plan button at the top of the page.
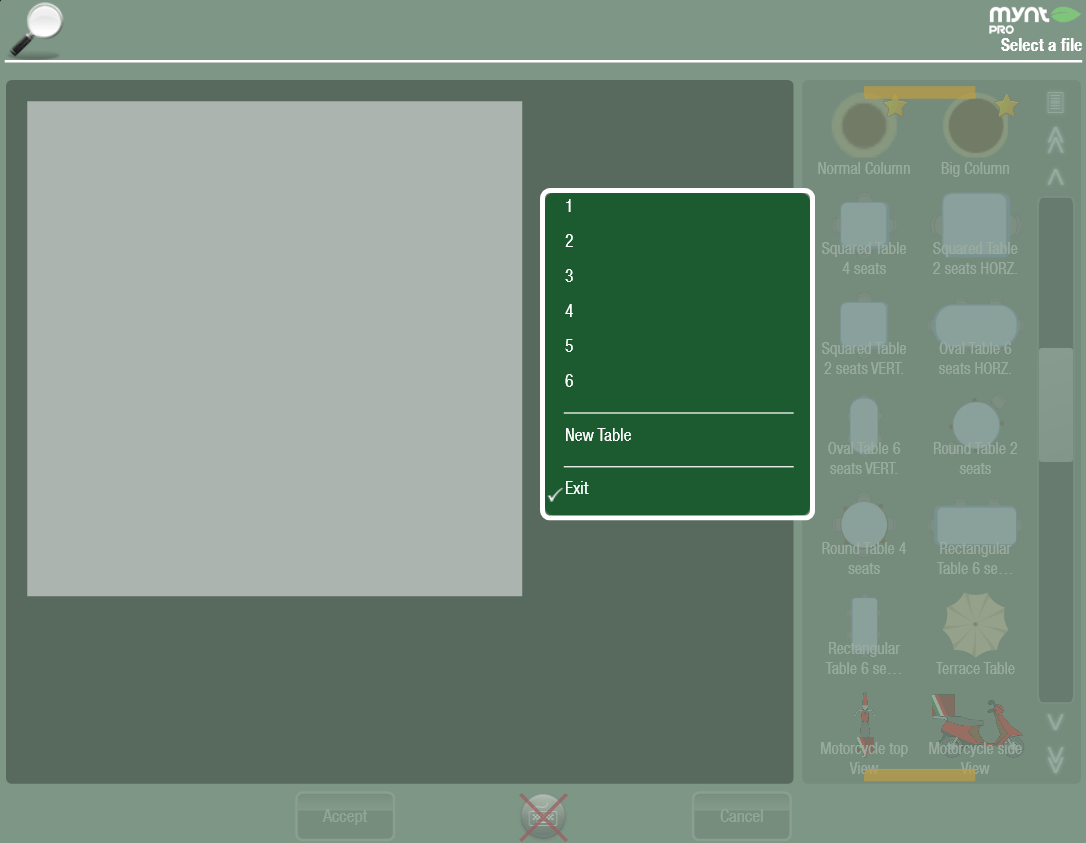
When you open up the floorplan view for the first time it will be blank. The column on the right has all of the table types and sizes that you can add. To add a table to the floorplan, just click on the table that you would like. A list will pop open, showing all of the tables that are currently part of this area, but not on the floorplan. Either select one of these tables, or click New Table to create a new table.
Once the table is added to the floorplan, you can press and drag on the table to move it to a new position. You can also use the anchors around the table to adjust the size of the table.
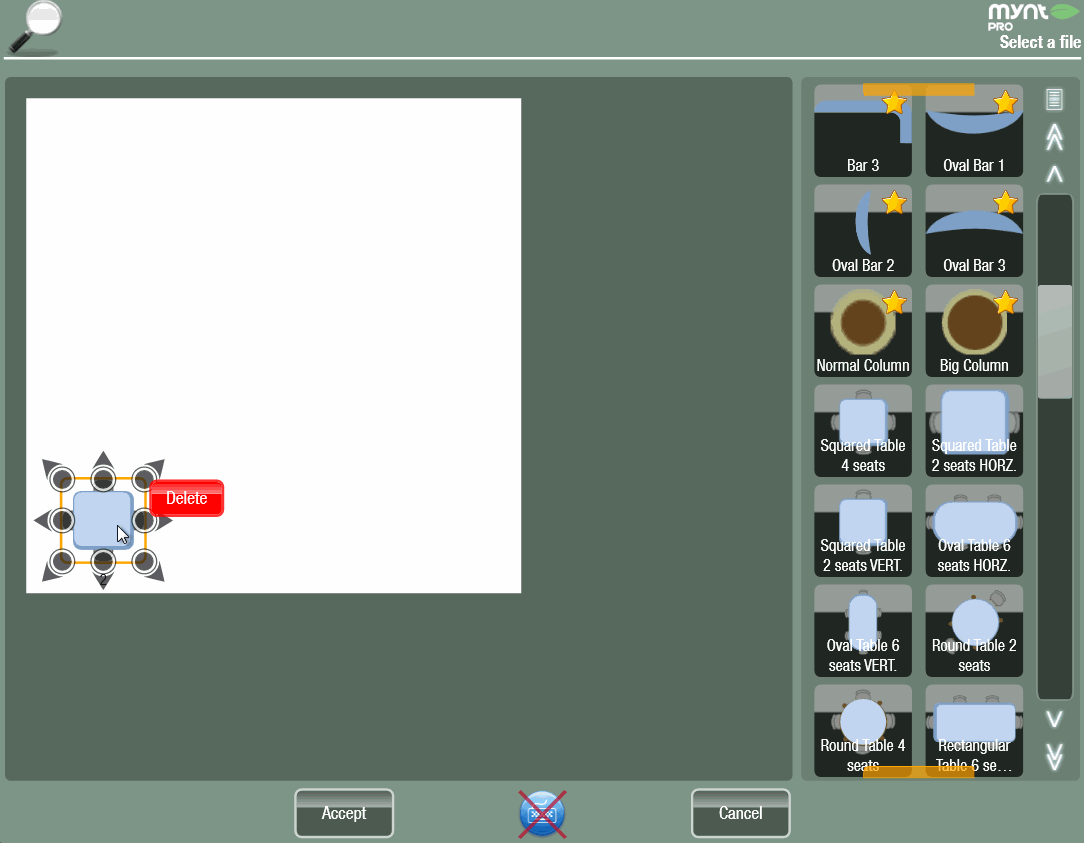
In the list of tables you will also find some plants and other items that can be used to mark dividers and other objects that are not tables. When adding these objects you will not be prompted to add a table to it.
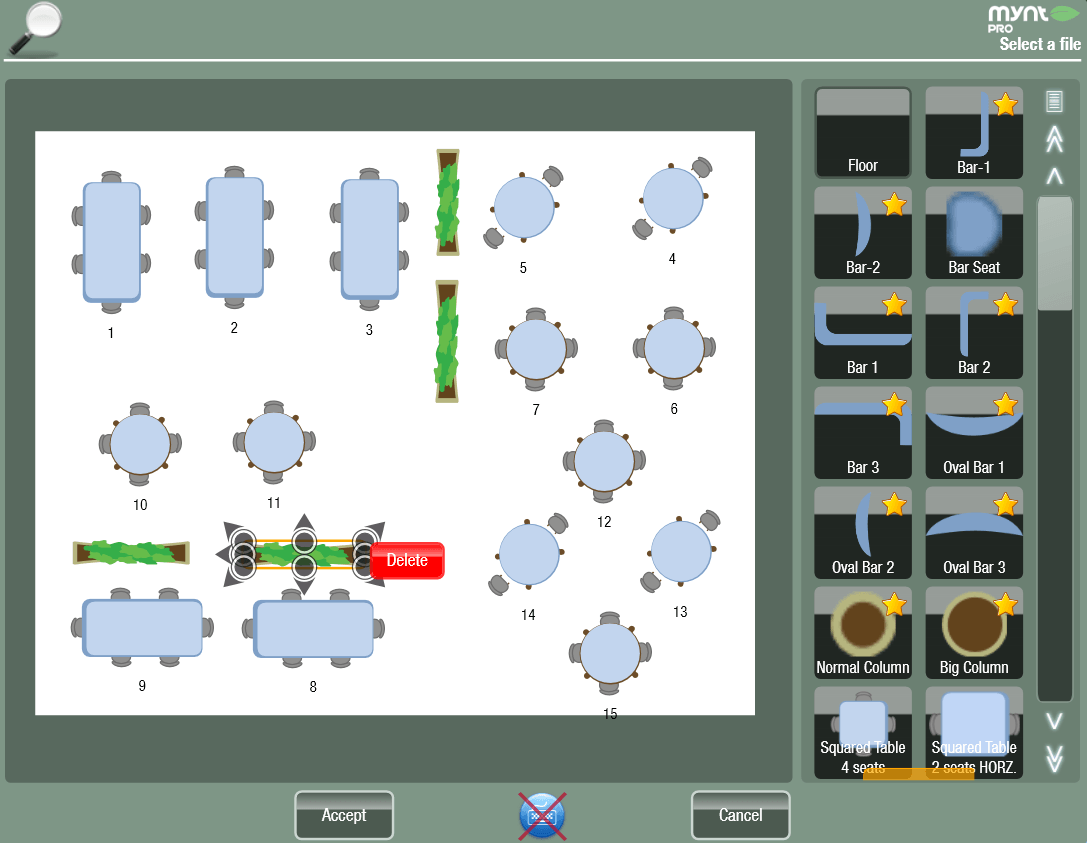
Continue to add items until you have completed your layout and then click on Accept.

