Auphan Core & Enterprise – Setup Item & Category Print Location
This is a guide to setup where an item or category will print when sent in the Auphan Software. This same concept and guide can be used to re-route items / categories to go to different printers.
- The printers are usually setup and configured by a Mynt tech. Once they are setup in the “Prep Printers/Screens” section, they become available to attach items & categories to.
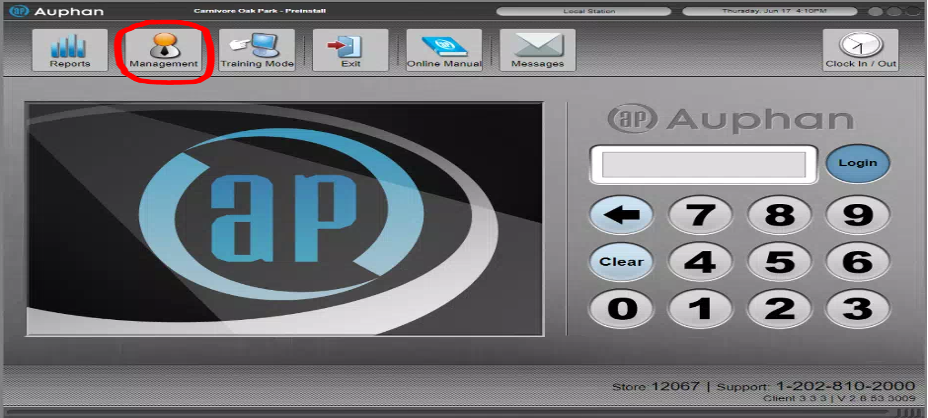
- Go to the “Management” screen.
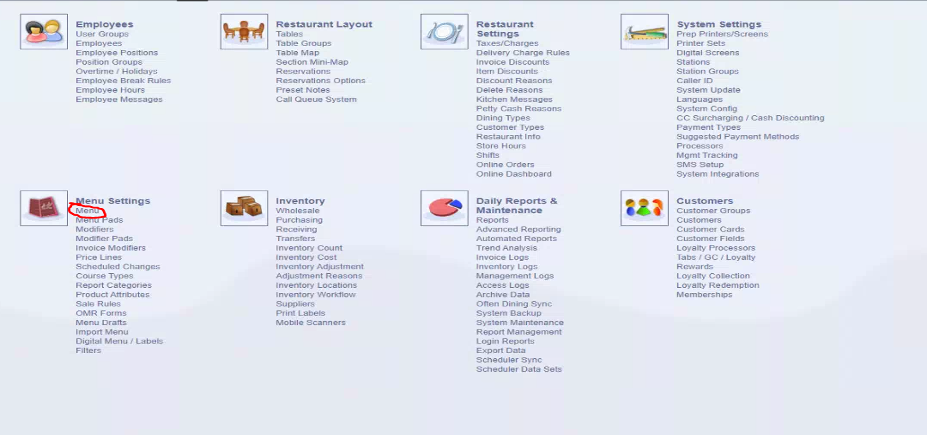
- To route the items / categories, go to “Menu”.
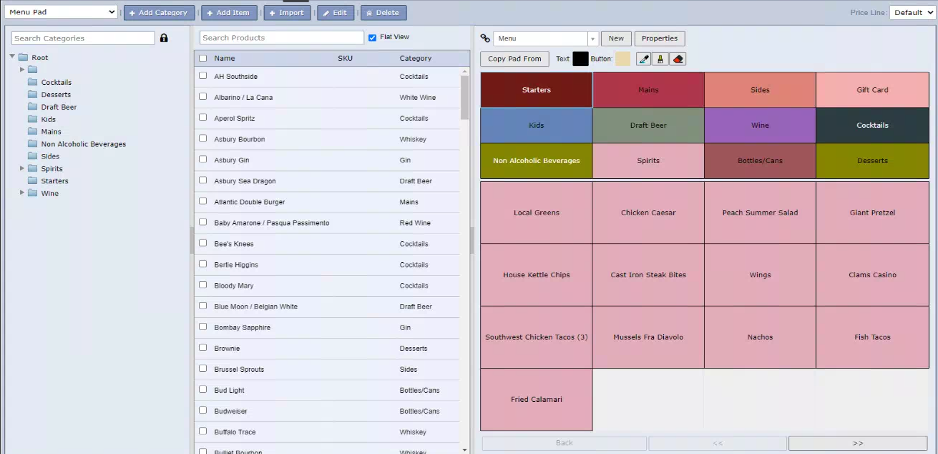
- Once you are in menu, you can double click on the category or item you want to route to a printer. Generally, it is easier to route an entire category to a printer, versus going through each item. In some cases, you might need to do a specific item, which is the same procedure.
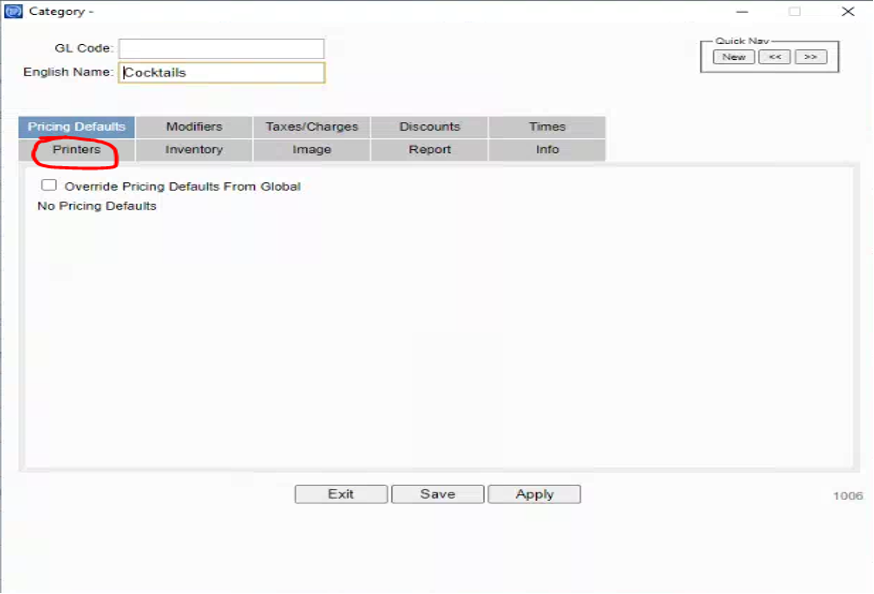
- Once in the category / item settings, one of the tabs is “Printers”. Click on this tab.
- You will then see the list of printers that are setup, from here, you can check off the “Override Printers from Global”. This is simply just overwriting the parent settings above it (i.e., if you set up a category to print to a printer, then go into an item in that category, it will take the categories settings, unless you chose the override printers from global. If this is checked, the item can override the printer settings from the category).
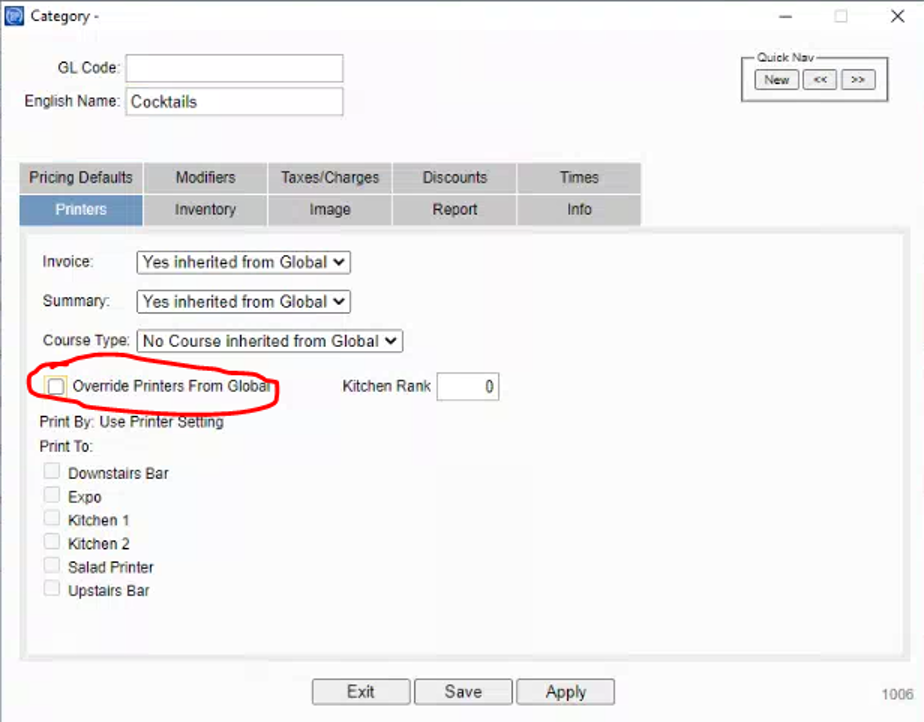
- Once this is checked, you can now check off the printers you would like the items to be routed to. Once you have the printers checked off, you can press save or apply to make the changes take effect. Keep in mind, any printer checked off will print a slip with these items on it after the “Send” button is pressed.
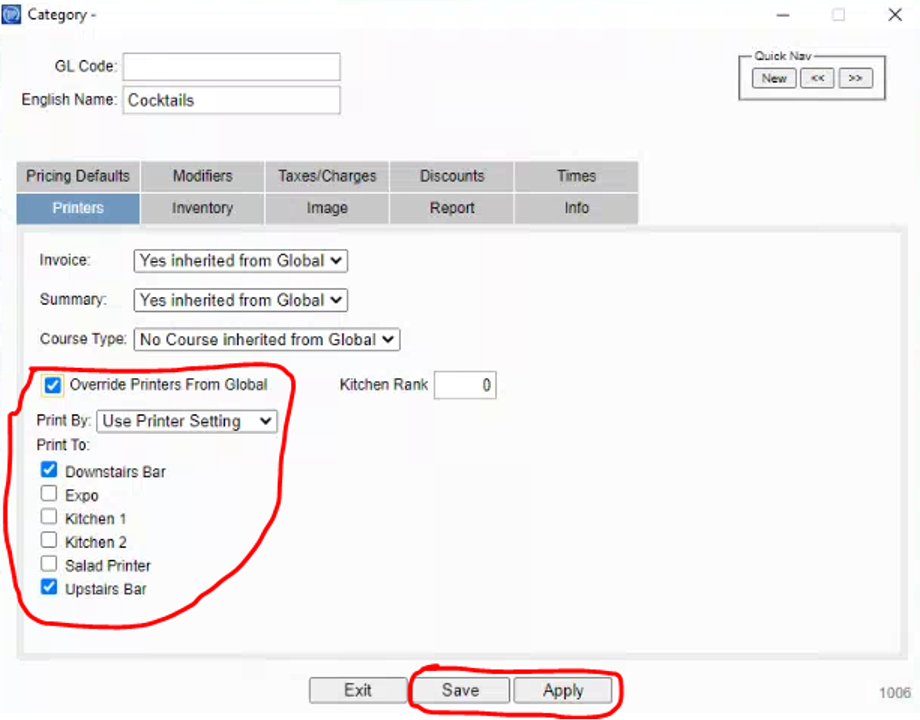
You can then test if you did it correctly by logging in, opening an invoice, selecting the item, and pressing “Send” in the top left. If setup was done correctly, the item(s) will be sent to the printer.
