Auphan Core & Enterprise – Creating and Applying Sales Rules
This is a step-by-step guide for creating and applying sales rules in Auphan. These are used to automatically apply Happy Hour prices, give 2 for 1 item, and apply any type of deal or discount over a given time or date.
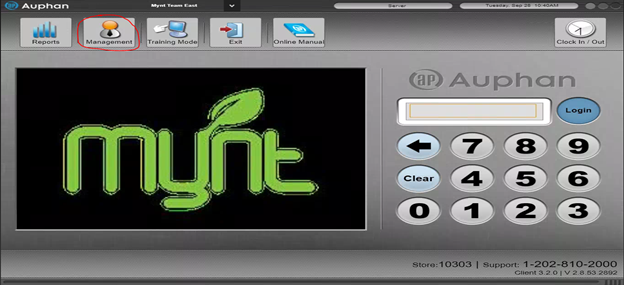
- To create a discount, we will want to go to “Management” on the top.
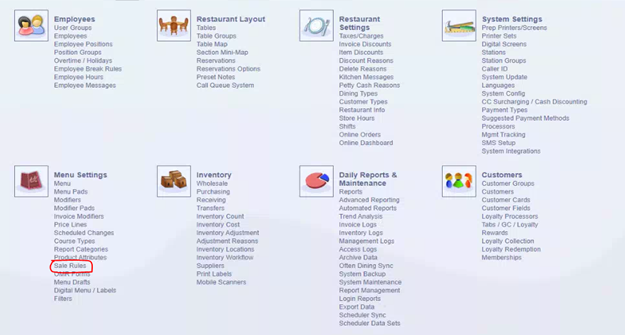
- You will then want to go to “Sales Rules” under Menu Settings.
- This is the sales rule screen. Here, you can view, edit, add new sales rules. We will use the add button in the top left corner.

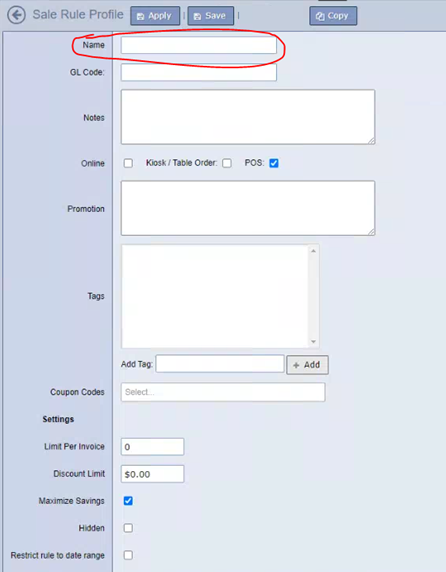
- This is where we can create our sales rule parameters, conditions, and actions. We will start by creating a name. For this example, I will use “Happy Hour”.
- Continuing to scroll down, we can set specific dates this will run or days and times. In this case, I will use “Restrict to time range” and we will set it to be every weekday from 12-3 PM.
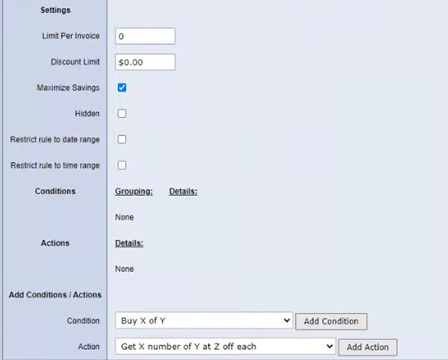
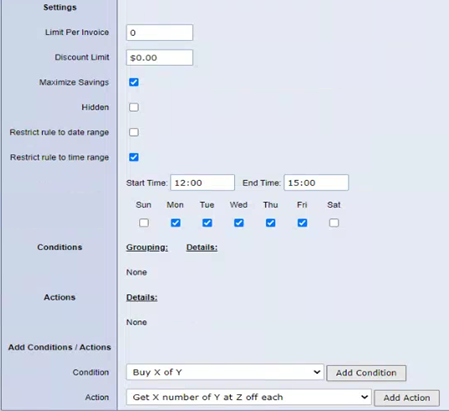
- Now we have our time and date set, it is time to set the specific conditions and actions for this sales rule.
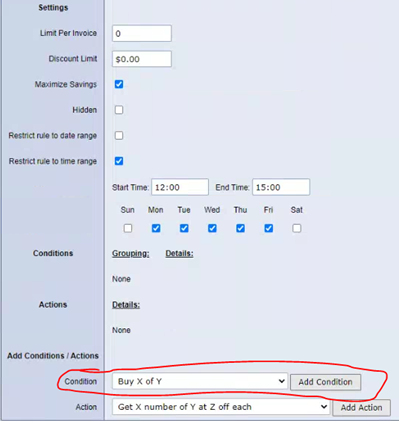
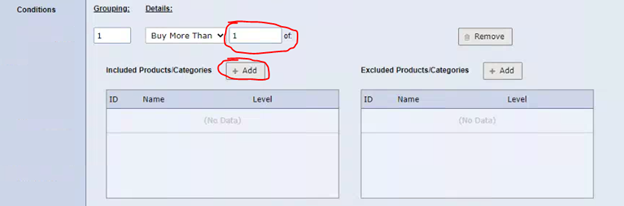
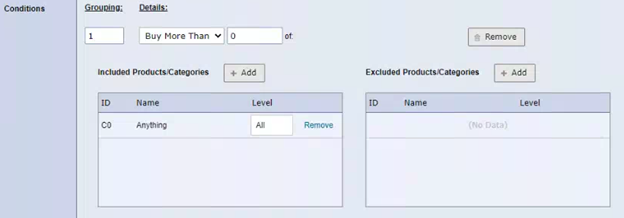
- Once the condition is set, we can modify the values in it. Most of the time, we want the condition to be “Buy More than 0 of: anything”. What this means is if the customer buys anything on the menu, they are eligible for our sales rule (which will be set up in the action). This is not saying if they buy anything, it will be discounted. This is simply saying if they purchase anything, they are eligible for our sales rule / action. We can do so by changing 1 to 0, then pressing the “add” button.
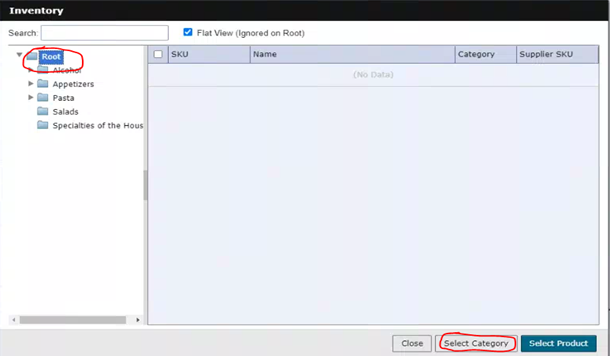
- In this screen, to get “Anything” populated, we can select “Root” from the inventory tree, then press “Select Category” in the bottom right. After we do this, we can press “Close” and now you will see Anything in the included chart.
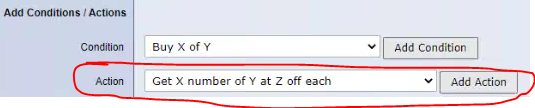
- Now we have our condition set, we can now set up our action: what will occur from our conditions. For this, we will use the “Get X number of Y at Z off each”.
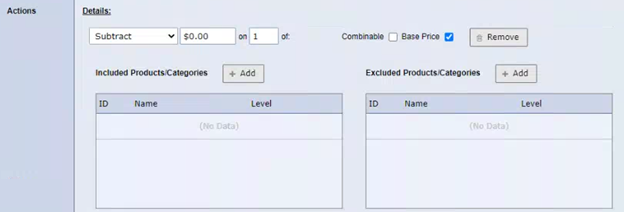
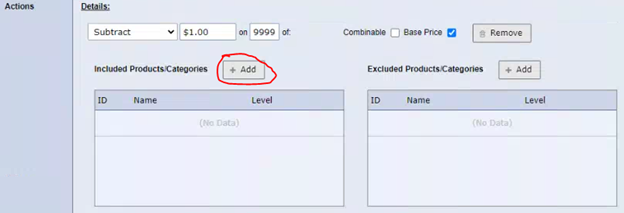
- Now we have our action. This is where we can set the parameters we want for the items we want discounted, increased, etc. For the happy hour rule, it is best to use “Subtract” or “Discounted to” in the drop down, then we set our dollar amount, and change the 1 to 9999 in the “on” portion. This is to not set a limit on the number of drinks that are discounted.
- In this case, I want to reduce bottled beer by $1, and draft beer by $0.50. To achieve this, I can use the “Add” button and go select my categories.
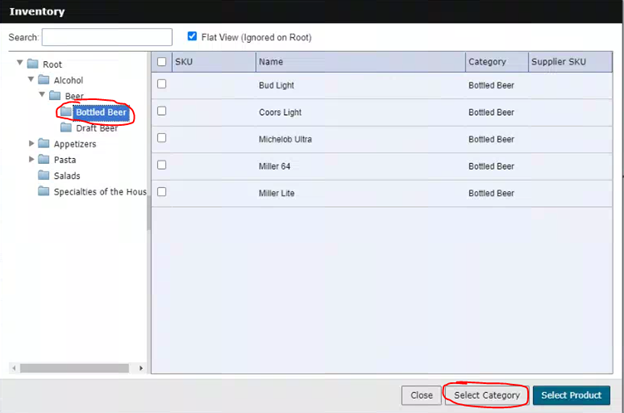
Once I am in the add screen, I can locate the items or categories I want added to this discount. In this case, I want to select the entire category of “Bottled Beer”. I will locate that on the left in the inventory tree, then press “Select Category” in the bottom right, then close. Note: You could also select the specific items using the check boxes, then use “Select Product” instead. However, it is more beneficial to do it by category when you can, in the event you add more bottled beer for example.
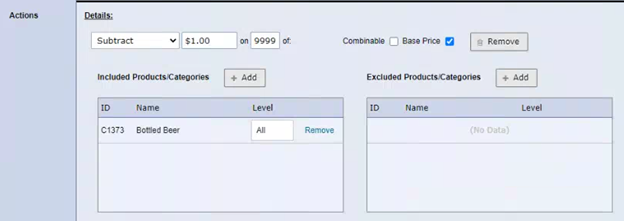
- We now see the bottled beer category subtracting off $1.
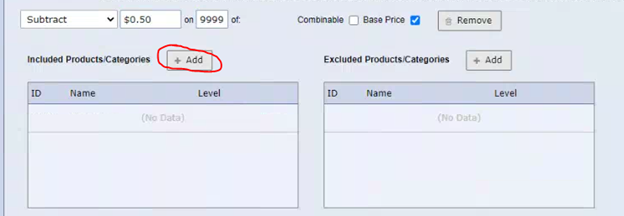
- Now, we can add another action for our draft beer to decrease by $0.50. We can go back down to the add action and use the same action.
- In this case, I want to reduce draft beer by $0.50. To achieve this, I can use the “Add” button and go select my categories.
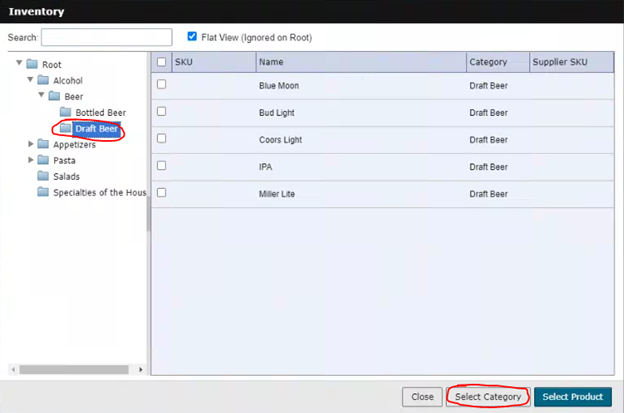
- Once I am in the add screen, I can locate the items or categories I want added to this discount. In this case, I want to select the entire category of “Draft Beer”. I will locate that on the left in the inventory tree, then press “Select Category” in the bottom right, then close.
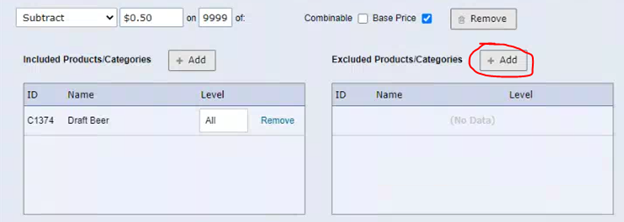
- We now see the draft beer category subtracting off $0.50. If we wanted to exclude specific bottled beer from this promotion, we could use the right side that says, “Excluded Products / Categories”. This allows us to maybe exclude a couple bottles that we might not want to discount. In this case, maybe I do not want to discount the IPA and Blue Moon. I can select “Add” button next to “Excluded Product / Categories”.
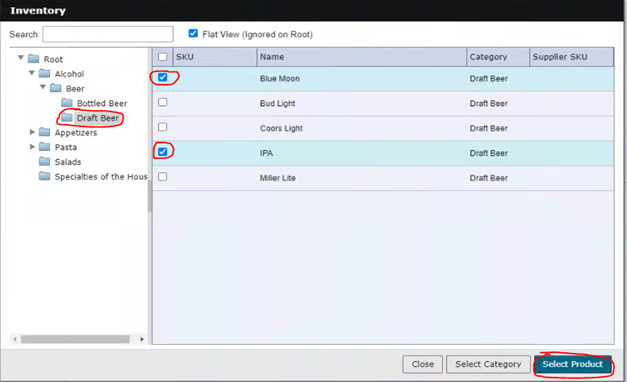
- Once I am in the add screen, I can locate the items or categories I want added to the exclusion. In this case, I want to exclude the Blue Moon and IPA from the draft discount. I can go to Draft Beer category on the left, and then select the two items on the right using the check boxes, then use “Select Product” and “Close”.
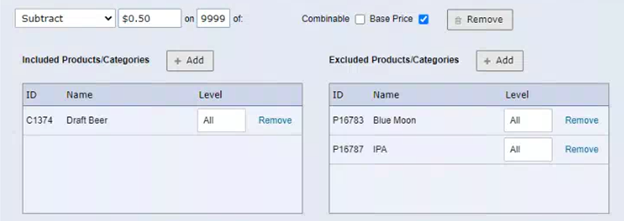
- We now see the rule all set up, with our draft beer included and the two beers excluded.
- We can now press “Save” at the top and login to test it out!

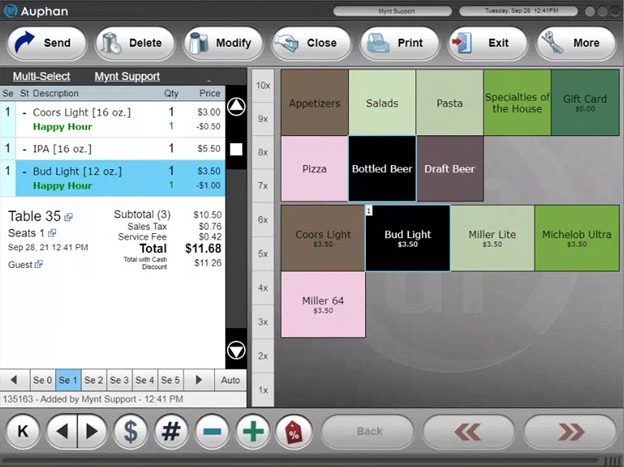
- If we login and go to select those items, we should see our sales rule reflected (given that we are currently in the time frame we set up in the previous step). In this case, our 16 oz. Coors Light Draft has $0.50 taken off, the Draft IPA does not have a discount, and the 12 oz. Bud Light Bottle has $1.00 taken off. This means our sales rule is working as intended!
Please Note: It is best to test these sales rules out before going live with it. We normally recommend trying it out, play around with the sales rule and set it up how you envision it, then set the time and date so you can test. You would not want to set it up for later that night and potentially have it not work properly It is best to set it to the date and time you are currently using it, go into training mode, and make sure it is doing everything you intend (i.e. what happens if you add two of the same item, what happens if it is past the time, etc.). It is generally good practice to test everything out before going live with it, in the event there are some bumps and hiccups along the way!

