Mynt Software Installation Guide
Once you have connected your Mynt POS system, use the following guide to setup Mynt for your business. Before you start this guide, make sure that you have downloaded your database file from Mynt POS and that you have the activation key that was emailed to you. If you do not have either of these materials, please contact Mynt before you proceed with the installation process (202-810-2000 or mynt@myntpos.com).
To open up Mynt for the first time, simply double tap and the Mynt icon in the upper left corner. This will cause Mynt to open up, the first thing Mynt will ask is for you to select the language that you would like to use, to use English, just tap Accept. To use another language, use the arrows on the sides to select a different flag and then tap Accept when you have the correct one highlighted.
After you have selected the language, Mynt will prompt you to activate it. To activate Mynt, simply type in the activation code that was emailed to you from a Mynt representative. If you do not have a Mynt activation code, please contact Mynt POS (202-810-2000 or mynt@myntpos.com). If you do not have a keyboard connected to your POS system, just tap on the keyboard button on the bottom of the screen, and then tap on the License Number box to open the on screen keyboard. Once you have typed in the license code, tap the Licensing button to activate Mynt.

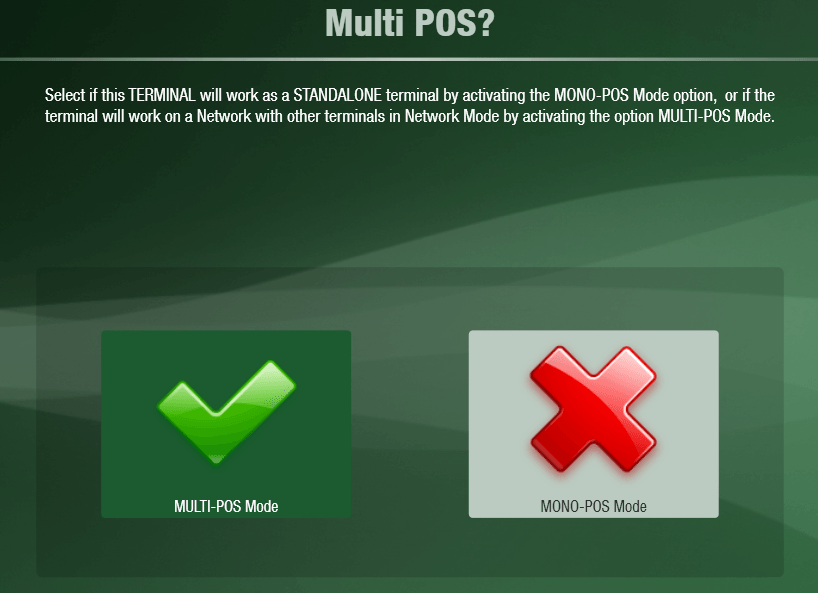
Once Mynt is activated, tap on Accept. On the next window, tap on MONO-POS Mode and then tap Next.
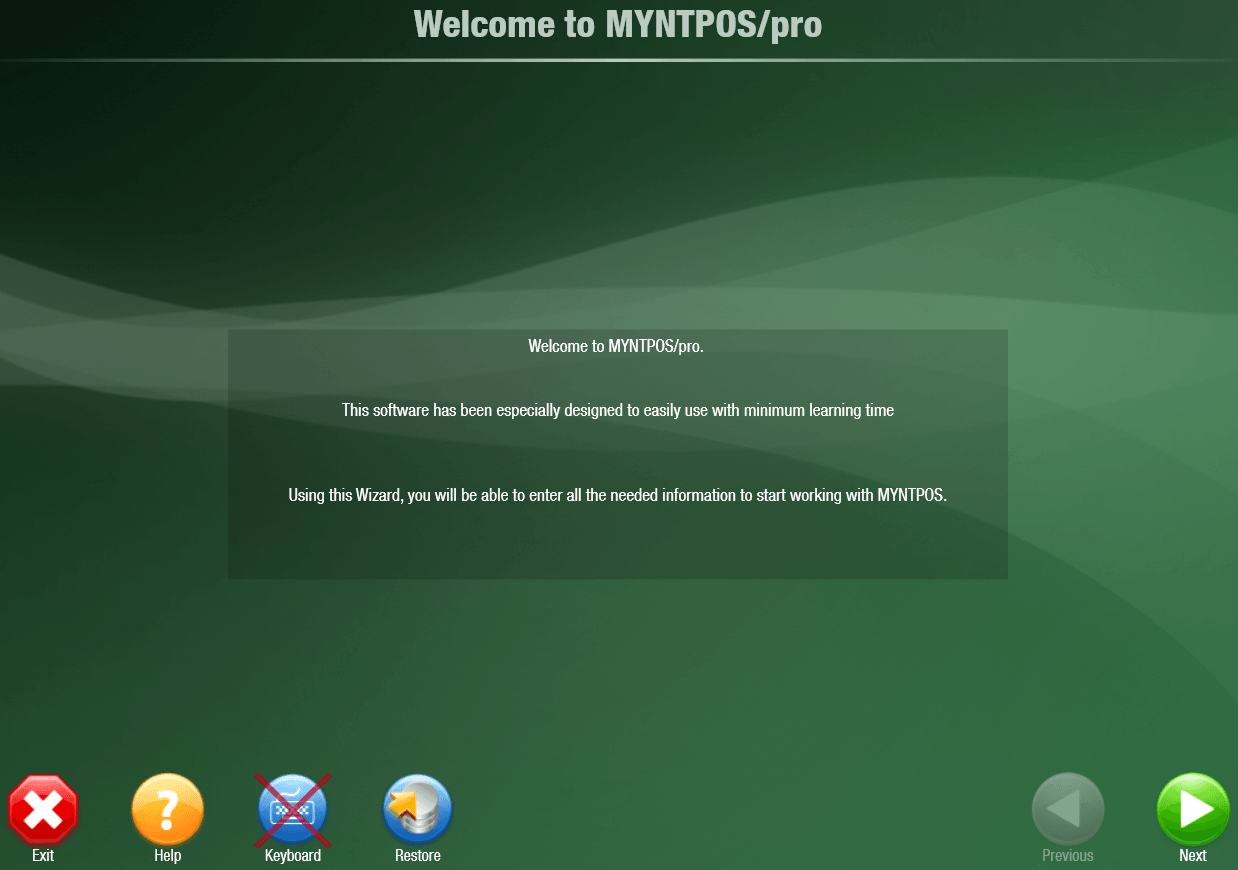
This will bring you to the Welcome to Mynt POS screen. From here you will need to load the Mynt backup file that was sent to you by Mynt. To load the file, tap on the Restore button at the bottom of the screen.
 Once you tap on the restore button, the Mynt file manager will open up. You will need to navigate to where you saved your database file, most likely that will be in your Downloads folder, found in C:\User\<YOUR USERNAME>\Downloads. Once you have located the file, tap on Accept.
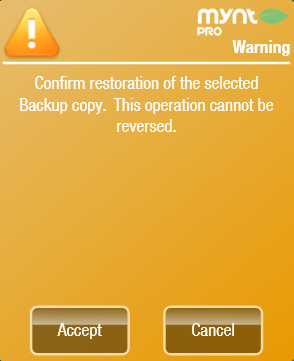
Tap Accept on the window that pops open and Mynt will close out and then open up and load the database. Once Mynt has opened back up and completed the restore, tap on the Manager account to get logged in.
Now that you are logged into the system, you will need to setup your printers, taxes, user accounts, and tables. The rest of this guide will walk you through the configuration.
To start configuring your Mynt system, tap the Setup button in the top left corner.
Your Mynt system will come with the receipt printer and cash drawer automatically configured, to test that these are working properly, or to setup additional printers, tap on Peripherals.
To test the receipt printer, tap on the printer and then tap the Self-check button. The printer should print out a small slip of paper that says Printer Test. If the test does not print, check that all of the cables are connected and that the printer is powered on. Once the test has printed successfully, tap the Accept button.
Tap on the cash drawer and then the Self-check button to test opening the cash drawer. If the drawer does not pop open, ensure the that cash drawer cable is connected to the back of the printer and that the lock on the cash drawer is in the unlocked vertical position. Once the cash drawer has popped open, tap the Accept key.
If you have any remote printers that need to be setup, please contact Mynt support for further instructions.
Once you have setup your printers, tap the Menu button in the bottom right corner to return to the setup menu. The next thing to setup is your Company Data, in Mynt company data is your business name, address and contact information. To setup your company data, tap Basic Company Data Setup and then Company Data.
This will open up the Company Data screen. From here you will need to enter your companies information, the receipt on the right will show you a preview of how the information will be formatted. There are six different layouts to choose from for the formatting of the receipt. You can tap on them to see a preview of what the layout looks like.
Once you have entered all of your company data, click the Menu button to return to the setup menu.
Now you will setup your Taxes. To do so, tap on the Taxes button under Basic Company Data. There will be two taxes created by default, a Sales tax and a Purchase tax. Sales tax will apply to the items you sell, and the purchase tax will apply to items on purchase orders that you generate. For most states a sales tax is all that you will need to configure.
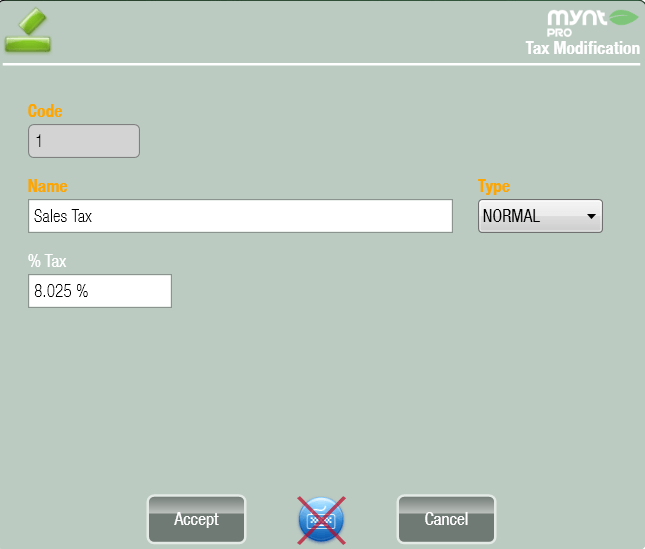
To setup the sales tax, just tap on Sales Tax and then the Edit button from the list on the right. In the window that opens up you can type in the tax rate and even rename the tax if you wish. Once you have entered your tax information, tap the Accept button to save the tax.
To configure more advanced taxes, like a liquor or bottle tax, see this page.
Once you have setup all of your required taxes, tap the Menu button in the bottom right corner to return to the setup screen.
The next thing to setup, is your user accounts. User accounts dictate what employees have access to, and for recording which account is completing sales. To start creating users, tap the Users button. This will open up the Users Setup Window.
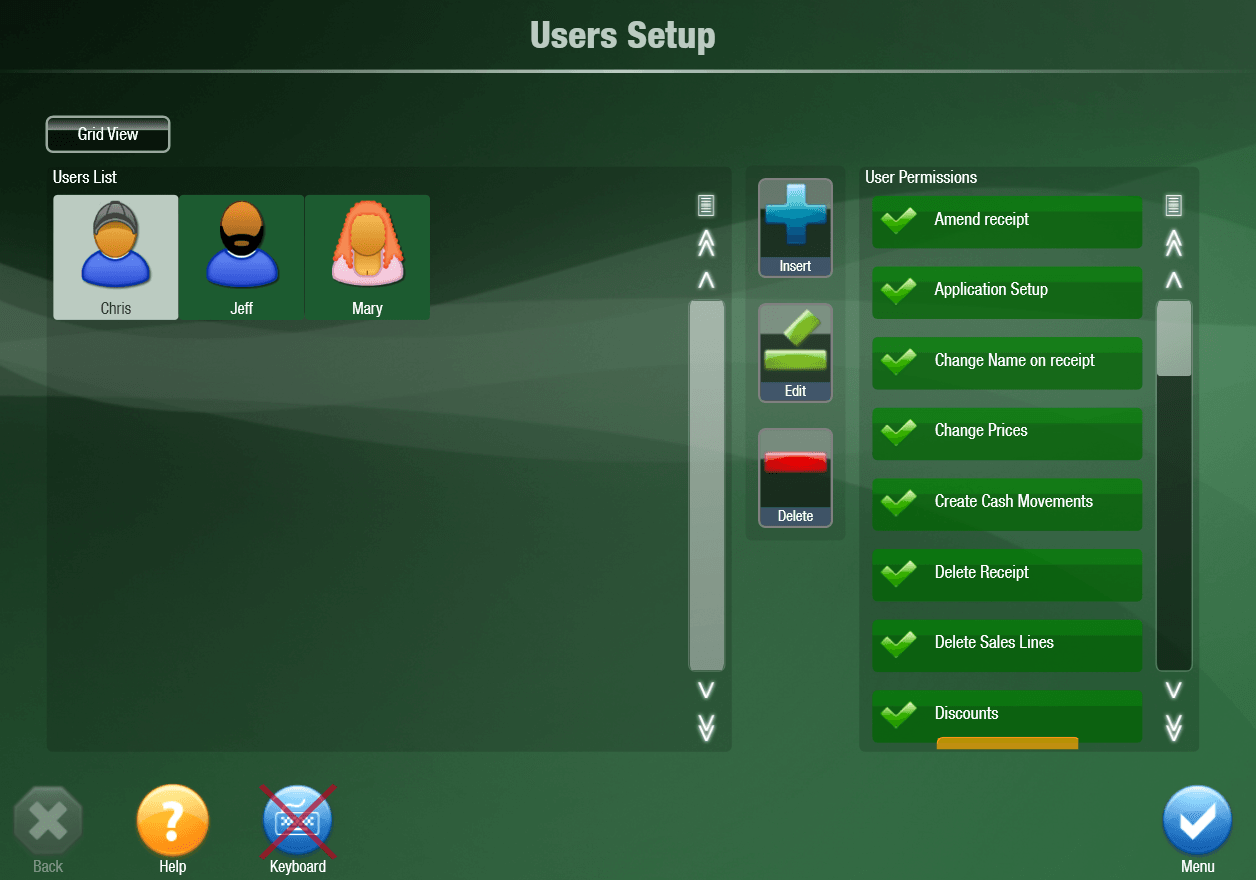
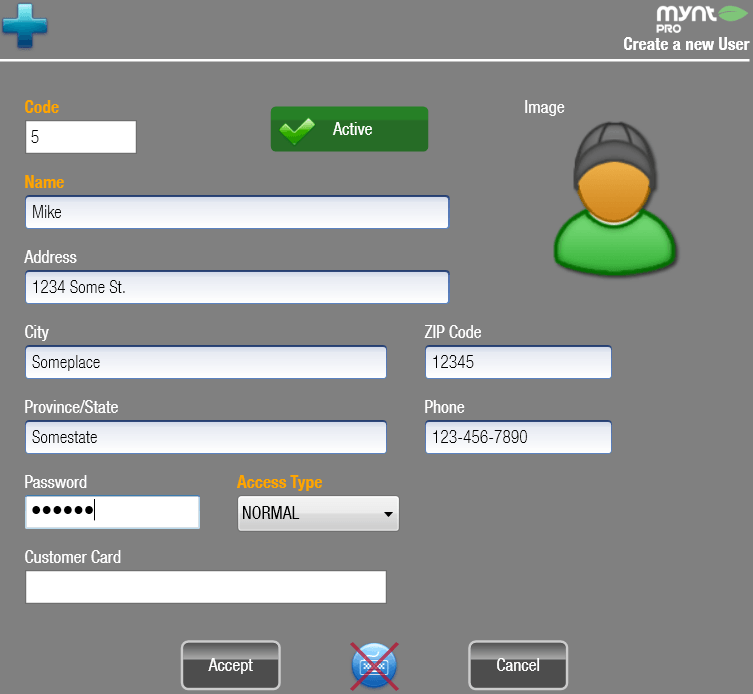
To create a new user, click the Insert button on the right side of the screen, that will open up the new user window.
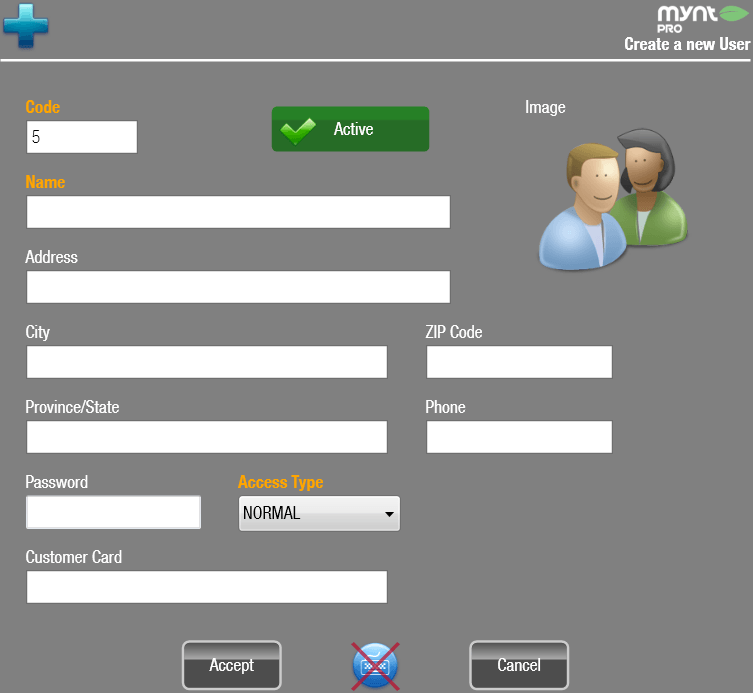
The Name and Access Type fields are required to be filled out, all of the others are optional.
There are two options for Access Type, NORMAL and Training. While a user is in Training mode, none of their sales information will be recorded in the main database, this is useful for training a new employee without making any sales that will be recorded with the main database.
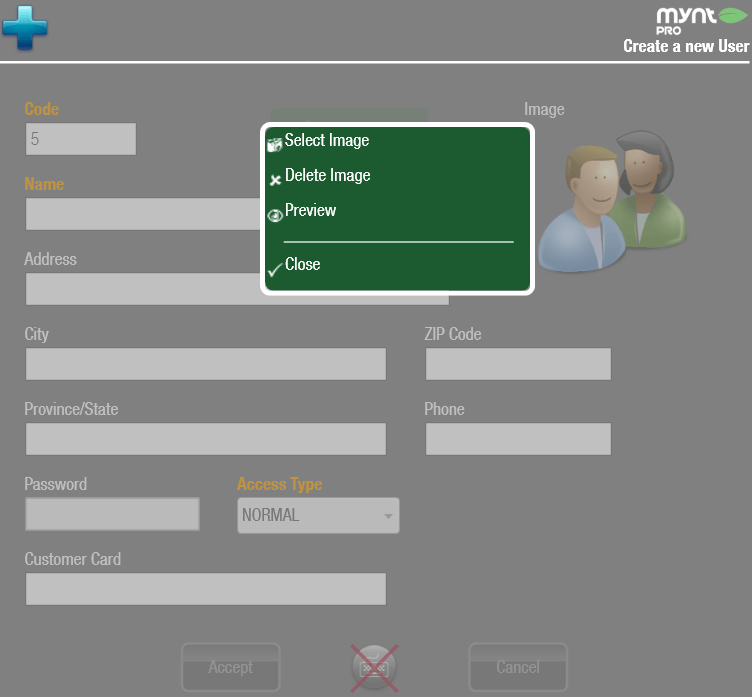
You can change the image for a user by clicking on the image in the upper right corner, and then clicking on Select Image.
Once you have entered in all of the data for the user, click on Accept to create the user.
Once a user has been created, you can set their permissions from the User Setup screen. Permissions are how you can control access to various features of the POS.
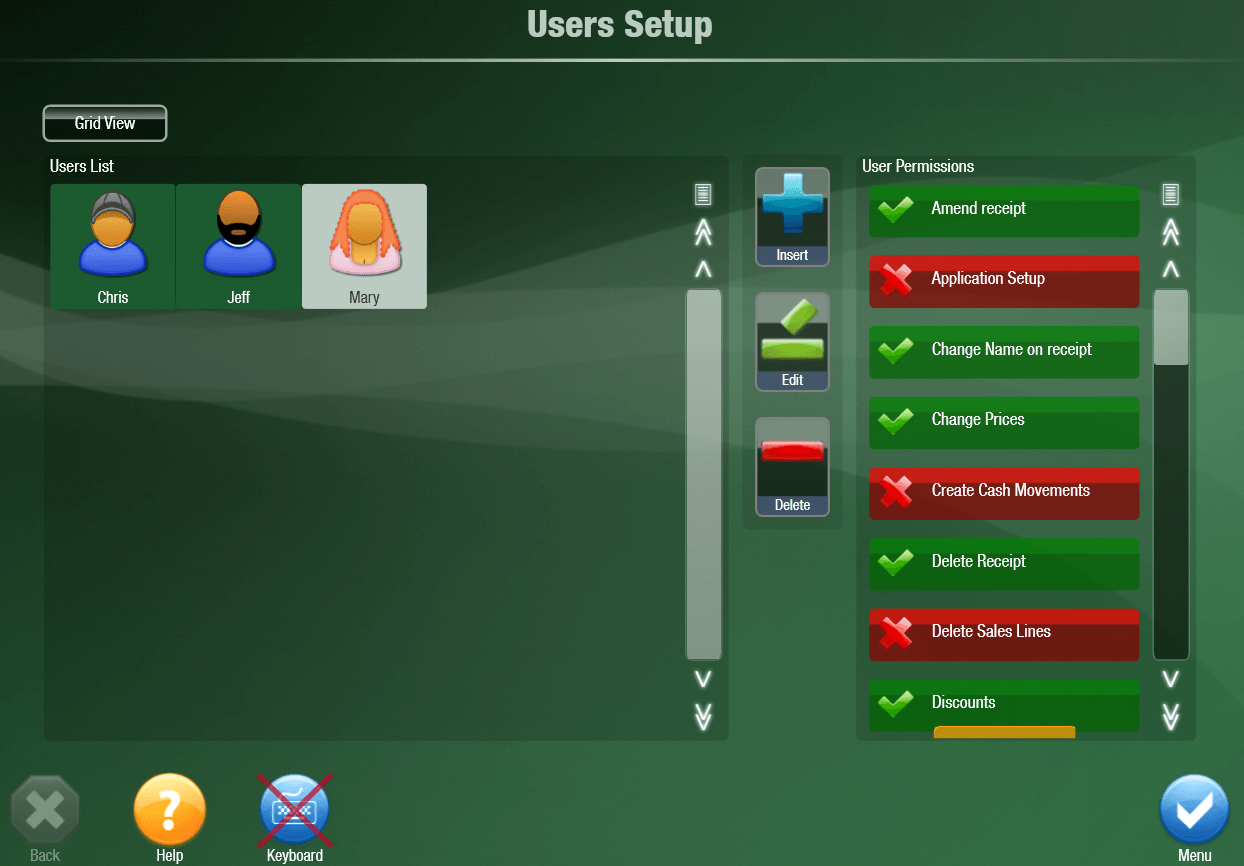
To change a user’s permissions, simply click on the user’s name, and then use the list on the right to either turn on or off each permission for that user. For a full list of permissions, and what they do, see this page.
Once you have setup all of your users and permissions, tap the menu button to return to the setup menu.
If your business is a restaurant that offers table service, you will now want to setup your tables and areas. If your business does not use table service, you can skip this step.
To setup your areas and tables, tap on Consumer Areas from the list on the left, and then tap on Consumer Areas & Tables?. In the window that opens up, tap on the green check mark labled There are Consumer Areas & Tables. Now tap the Menu button to return to the previous screen. Next tap on the Tables button to open up the tables and areas management. From this screen click the Insert button on the left to create a new area.
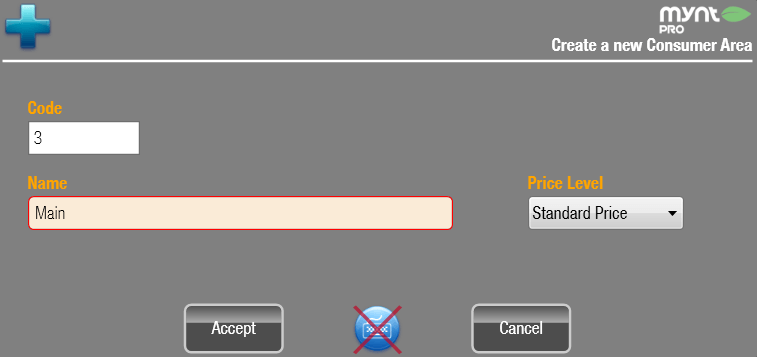
Type in a name for the area, and select a price level, then tap on Accept to save the new area.
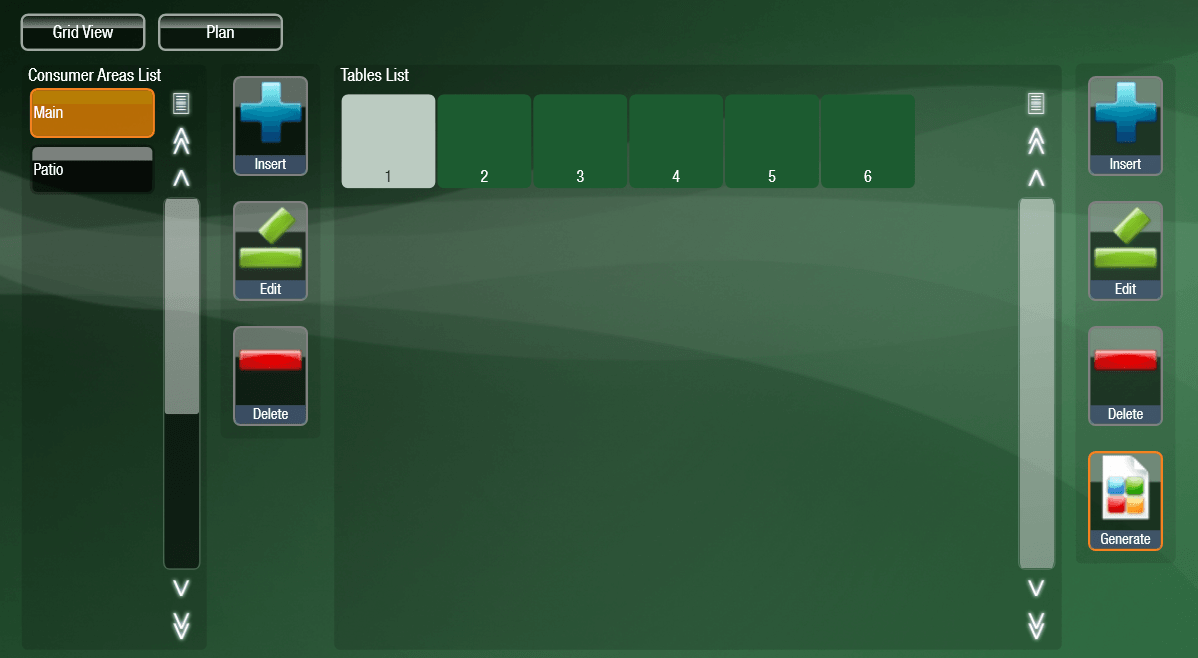
When working with tables, there are two different views you can use, floorplan and plan. Floorplan is a map of the layout of your business, plan is just a list of all of the tables. You can create new tables from either of these two views.
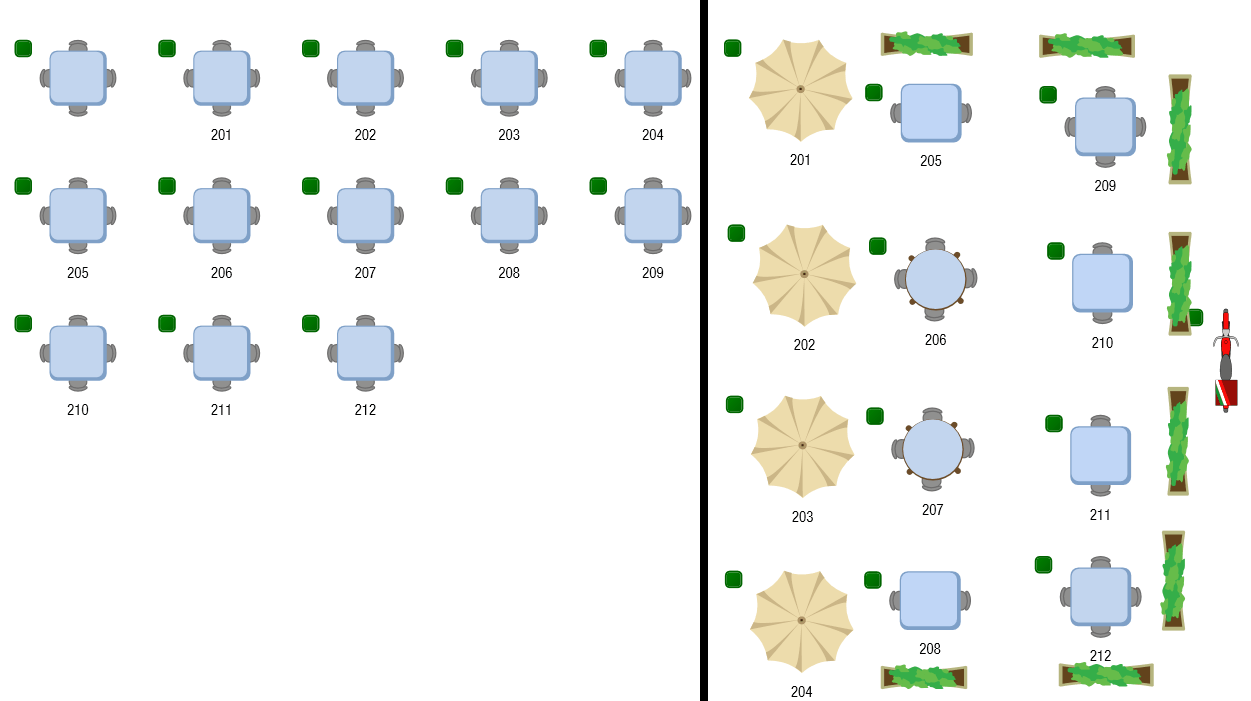
The left side shows the Plan view, with the just tables listed. The right side is showing all of the tables using the Floorplan view.
The quickest way to create a large number of tables is to tap on the Generate button, this will automatically generate a chosen number of tables at one time.

Once the tables have been generated, they will show up in the tables list.
With the tables generated you can then go into the floorplan view and add the tables to their proper location. To open the floorplan view, tap on the Plan button at the top of the page.
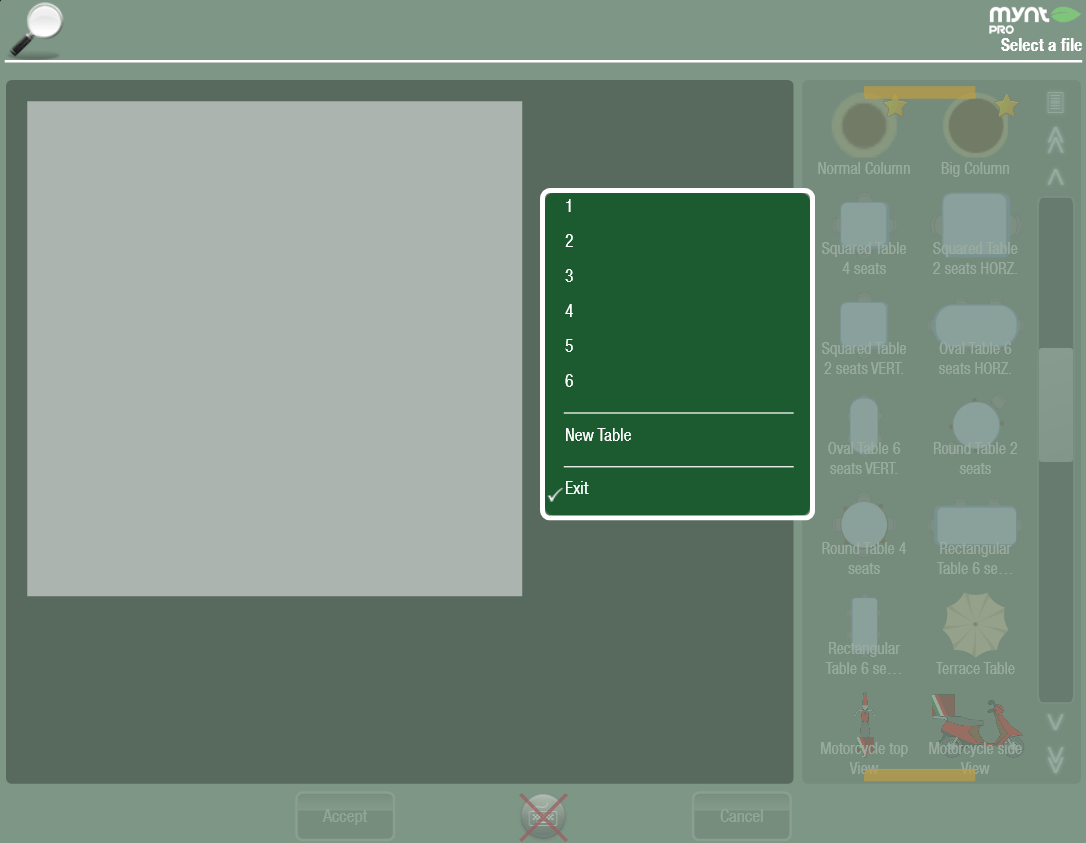
When you open up the floorplan view for the first time it will be blank. The column on the right has all of the table types and sizes that you can add. To add a table to the floorplan, just tap on the table that you would like. A list will pop open, showing all of the tables that are currently part of this area, but not on the floorplan. Either select one of these tables, or tap New Table to create a new table.
Once the table is added to the floorplan, you can press and drag on the table to move it to a new position. You can also use the anchors around the table to adjust the size of the table.
Click on this image to see an example of how to re-size a table.
In the list of tables you will also find some plants and other items that can be used to mark dividers and other objects that are not tables. When adding these objects you will not be prompted to add a table to it.
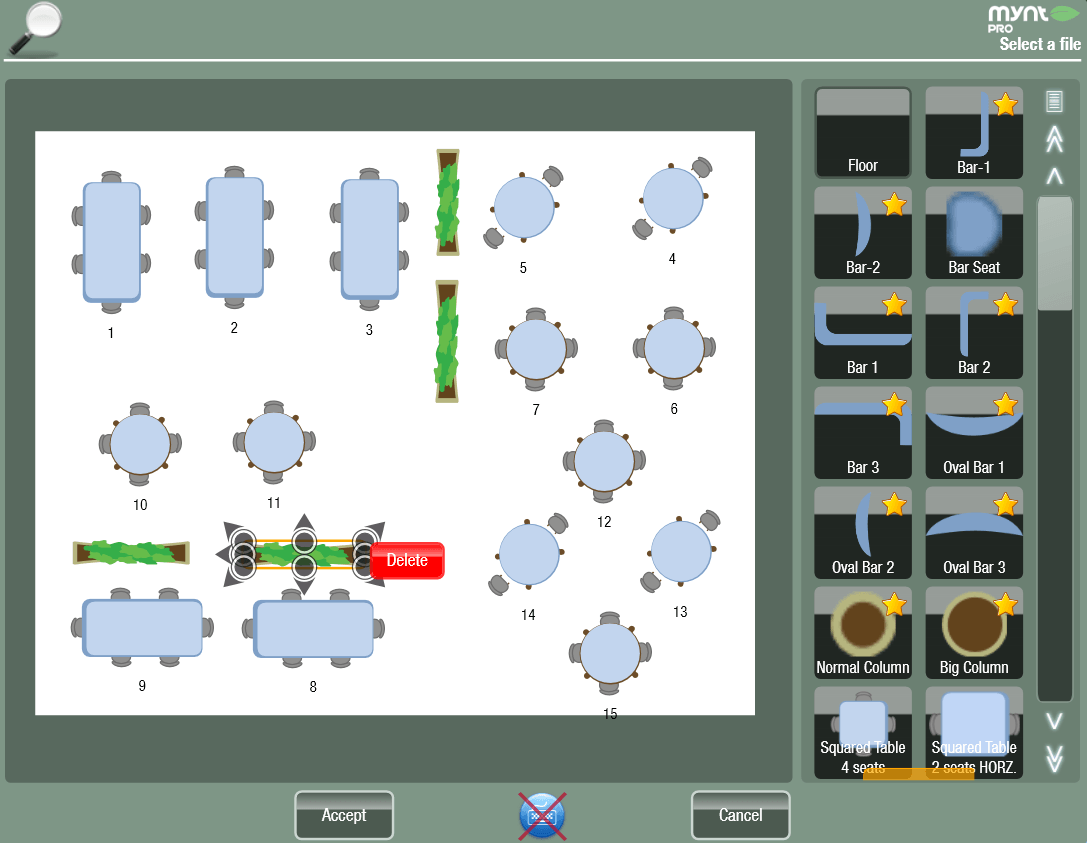
Continue to add items until you have completed your layout and then tap on Accept. Once you have setup all of your areas and tables, tap the Menu button to return to the setup menu.
The next thing you need to setup is the Worldpay Payment Terminal. This is how your credit cards will be processed and how Worldpay will make sure they are processed through your account. To setup the Worldpay terminal, tap on Miscellaneous Setup and then Worldpay. In this window type in your Merchant ID and your Terminal ID, both of these items will be with your account information provided by Worldpay, if you do not have this information, contact Mynt for assistance. Next, tap the Get Status button to open up the payment terminal.
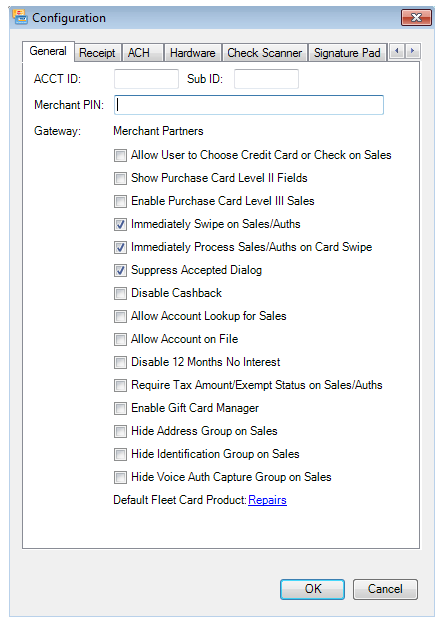
In the window that opens up, you will need to put in the Account ID, Sub ID and Merchant PIN. All of this information will be found in the documentation provided to you with your Worldpay account. You will need to have a keyboard connected to your system to put in this information. If you do not have a keyboard connected to your system, either connect a keyboard or contact Mynt support for further assistance. You will also want to check the buttons, Immediately Swipe on Sales/Auths, Immediately Process on Sales/Auths on Card Swipe, and Suppress Accepted Dialog. Once you have put in all this information, tap the OK button.
Once you have entered all of this information, tap the Menu button in the bottom right corner to return to the setup menu.
The last thing to configure is Additional Parameters. This is where are can find a few additional settings that can be configured. How you will configure these settings will depend on your business.
The most popular ones to configure are choosing a quick tender, requiring tables and printing kitchen receipts without a table. To activate any of these options, just tap on the button to enable or disable it.
Once you have setup all of your parameters tap the Menu button to return to the setup menu. Now that you are back at the setup screen, tap the Back button to return to the sales screen.
You have now completed setting up your Mynt POS system and are ready to start running your business. For further training, please see the Mynt support center, or contact Mynt at 202-810-2000.

